8 minutes
Install Apache Guacamole for SSH and VNC over HTML5
I struggled a little bit with the installation on Apache Guacamole. I think this tutorial will help some people. I installed it on Ubuntu 18.04.
Install VNC
Install the following packages:
sudo apt-get install -y ubuntu-desktop gnome-panel gnome-settings-daemon metacity nautilus gnome-terminal tightvncserver
We are going to create a VNC startup script:
cd
mkdir ~/.vnc
Create a VNC startup script at this location ~/.vnc/xstartup and enter this content:
Option 1: Pour Ubuntu 18.04 “classique” avec le desktop environment Gnome
#!/bin/sh

xrdb $HOME/.Xresources
xsetroot -solid grey
#x-terminal-emulator -geometry 80x24+10+10 -ls -title "$VNCDESKTOP Desktop" &
#x-window-manager &
# Fix to make GNOME work
export XKL_XMODMAP_DISABLE=1
/etc/X11/Xsession

unset SESSION_MANAGER
vncconfig -iconic &
x-terminal-emulator -geometry 80x24+10+10 -ls -title "$VNCDESKTOP Desktop" &
x-window-manager &
gnome-panel &
gnome-settings-daemon &
nautilus &
metacity &
gnome-session-flashback &
Option 2: Pour Ubuntu Mate
#!/bin/sh
unset DBUS_SESSION_BUS_ADDRESS
[ -x /etc/vnc/xstartup ] && exec /etc/vnc/xstartup
[ -r $HOME/.Xresources ] && xrdb $HOME/.Xresources
xsetroot -solid grey
vncconfig -iconic &
x-terminal-emulator -geometry 80x24+10+10 -ls -title "$VNCDESKTOP Desktop" &
x-window-manager &
mate-session &
Donner les droits d’exécution sur le fichier ~/.vnc/xstartup:
sudo chmod +x ~/.vnc/xstartup
Reconfigure the session manager:
sudo update-alternatives --config x-session-manager
Select: /usr/lib/gnome-flashback/gnome-flashback-metacity
Fix rights issue:
sudo chown -R olivier:olivier /home/olivier/.cache/dconf
Create VNC service
sudo vi /etc/systemd/system/[email protected]
Enter the following content. Replace olivier by your username.
[Unit]
Description=Start TightVNC server at startup
After=syslog.target network.target

[Service]
Type=forking
User=olivier
Group=olivier
WorkingDirectory=/home/olivier

PIDFile=/home/olivier/.vnc/%H:%i.pid
ExecStartPre=-/usr/bin/vncserver -kill :%i > /dev/null 2>&1
ExecStart=/usr/bin/vncserver -depth 24 -geometry 1280x800 :%i
ExecStop=/usr/bin/vncserver -kill :%i

[Install]
WantedBy=multi-user.target
Configure vncserver. To do so execute vncserver and enter a vnc password. Do not create a readonly password. When you are done kill the running server.
vncserver -kill :1
Start the service:
sudo systemctl daemon-reload
sudo systemctl enable [email protected]
sudo systemctl start vncserver@1
Install Guacamole
Create a install script and enter the following content:
#!/bin/bash

# Check if user is root or sudo
if ! [ $(id -u) = 0 ]; then echo "Please run this script as sudo or root"; exit 1 ; fi

# Version number of Guacamole to install
GUACVERSION="1.0.0"

# Colors to use for output
YELLOW='\033[1;33m'
BLUE='\033[0;34m'
RED='\033[0;31m'
GREEN='\033[0;32m'
NC='\033[0m' # No Color

# Log Location
LOG="/tmp/guacamole_${GUACVERSION}_build.log"

# Get script arguments for non-interactive mode
while [ "$1" != "" ]; do
    case $1 in
        -m | --mysqlpwd )
            shift
            mysqlpwd="$1"
            ;;
        -g | --guacpwd )
            shift
            guacpwd="$1"
            ;;
        -u | --mysqluser )
            shift
            mysqluser="$1"
            ;;
        -d | --database )
            shift
            DB="$1"
            ;;
    esac
    shift
done

# Checking if mysql user given
if [ -z "$mysqluser" ]; then
    mysqluser="guacamole_user"
fi

# Checking if database name given
if [ -z "$DB" ]; then
    DB="guacamole_db"
fi

# Get MySQL root password and Guacamole User password
if [ -n "$mysqlpwd" ] && [ -n "$guacpwd" ]; then
        mysqlrootpassword=$mysqlpwd
        guacdbuserpassword=$guacpwd
else
    echo
    while true
    do
        read -s -p "Enter a MySQL ROOT Password: " mysqlrootpassword
        echo
        read -s -p "Confirm MySQL ROOT Password: " password2
        echo
        [ "$mysqlrootpassword" = "$password2" ] && break
        echo "Passwords don't match. Please try again."
        echo
    done
    echo
    while true
    do
        read -s -p "Enter a Guacamole User Database Password: " guacdbuserpassword
        echo
        read -s -p "Confirm Guacamole User Database Password: " password2
        echo
        [ "$guacdbuserpassword" = "$password2" ] && break
        echo "Passwords don't match. Please try again."
        echo
    done
    echo
fi

debconf-set-selections <<< "mysql-server mysql-server/root_password password $mysqlrootpassword"
debconf-set-selections <<< "mysql-server mysql-server/root_password_again password $mysqlrootpassword"

# Ubuntu and Debian have different package names for libjpeg
# Ubuntu and Debian versions have differnet package names for libpng-dev
# Ubuntu 18.04 does not include universe repo by default
source /etc/os-release
if [[ "${NAME}" == "Ubuntu" ]]
then
    JPEGTURBO="libjpeg-turbo8-dev"
    if [[ "${VERSION_ID}" == "18.04" ]]
    then
        sed -i 's/bionic main$/bionic main universe/' /etc/apt/sources.list
    fi
    if [[ "${VERSION_ID}" == "16.04" ]]
    then
        LIBPNG="libpng12-dev"
    else
        LIBPNG="libpng-dev"
    fi
elif [[ "${NAME}" == *"Debian"* ]]
then
    JPEGTURBO="libjpeg62-turbo-dev"
    if [[ "${PRETTY_NAME}" == *"stretch"* ]]
    then
        LIBPNG="libpng-dev"
    else
        LIBPNG="libpng12-dev"
    fi
else
    echo "Unsupported Distro - Ubuntu or Debian Only"
    exit 1
fi

# Update apt so we can search apt-cache for newest tomcat version supported
apt-get -qq update

# Tomcat 8.0.x is End of Life, however Tomcat 7.x is not...
# If Tomcat 8.5.x or newer is available install it, otherwise install Tomcat 7
# I have not testing with Tomcat9...
if [[ $(apt-cache show tomcat8 | egrep "Version: 8.[5-9]" | wc -l) -gt 0 ]]
then
    TOMCAT="tomcat8"
else
    TOMCAT="tomcat7"
fi

if [ -z $(command -v mysql) ]
then
    MYSQL="mysql-server mysql-client mysql-common mysql-utilities"
else
    MYSQL=""
fi

# Uncomment to manually force a tomcat version
#TOMCAT=""

# Install features
echo -e "${BLUE}Installing dependencies. This might take a few minutes...${NC}"

export DEBIAN_FRONTEND=noninteractive

apt-get -y install build-essential libcairo2-dev ${JPEGTURBO} ${LIBPNG} libossp-uuid-dev libavcodec-dev libavutil-dev \
libswscale-dev libfreerdp-dev libpango1.0-dev libssh2-1-dev libtelnet-dev libvncserver-dev libpulse-dev libssl-dev \
libvorbis-dev libwebp-dev ${MYSQL} libmysql-java ${TOMCAT} freerdp-x11 \
ghostscript wget dpkg-dev &>> ${LOG}

if [ $? -ne 0 ]; then
    echo -e "${RED}Failed. See ${LOG}${NC}"
    exit 1
else
    echo -e "${GREEN}OK${NC}"
fi

# Set SERVER to be the preferred download server from the Apache CDN
SERVER="http://apache.org/dyn/closer.cgi?action=download&filename=guacamole/${GUACVERSION}"
echo -e "${BLUE}Downloading Files...${NC}"

# Download Guacamole Server
wget -q --show-progress -O guacamole-server-${GUACVERSION}.tar.gz ${SERVER}/source/guacamole-server-${GUACVERSION}.tar.gz
if [ $? -ne 0 ]; then
    echo -e "${RED}Failed to download guacamole-server-${GUACVERSION}.tar.gz"
    echo -e "${SERVER}/source/guacamole-server-${GUACVERSION}.tar.gz${NC}"
    exit 1
fi
echo -e "${GREEN}Downloaded guacamole-server-${GUACVERSION}.tar.gz${NC}"

# Download Guacamole Client
wget -q --show-progress -O guacamole-${GUACVERSION}.war ${SERVER}/binary/guacamole-${GUACVERSION}.war
if [ $? -ne 0 ]; then
    echo -e "${RED}Failed to download guacamole-${GUACVERSION}.war"
    echo -e "${SERVER}/binary/guacamole-${GUACVERSION}.war${NC}"
    exit 1
fi
echo -e "${GREEN}Downloaded guacamole-${GUACVERSION}.war${NC}"

# Download Guacamole authentication extensions (Database)
wget -q --show-progress -O guacamole-auth-jdbc-${GUACVERSION}.tar.gz ${SERVER}/binary/guacamole-auth-jdbc-${GUACVERSION}.tar.gz
if [ $? -ne 0 ]; then
    echo -e "${RED}Failed to download guacamole-auth-jdbc-${GUACVERSION}.tar.gz"
    echo -e "${SERVER}/binary/guacamole-auth-jdbc-${GUACVERSION}.tar.gz"
    exit 1
fi
echo -e "${GREEN}Downloaded guacamole-auth-jdbc-${GUACVERSION}.tar.gz${NC}"

# Download Guacamole authentication extensions (TOTP)
wget -q --show-progress -O guacamole-auth-totp-${GUACVERSION}.tar.gz ${SERVER}/binary/guacamole-auth-totp-${GUACVERSION}.tar.gz
if [ $? -ne 0 ]; then
    echo -e "${RED}Failed to download guacamole-auth-totp-${GUACVERSION}.tar.gz"
    echo -e "${SERVER}/binary/guacamole-auth-totp-${GUACVERSION}.tar.gz"
    exit 1
fi
echo -e "${GREEN}Downloaded guacamole-auth-totp-${GUACVERSION}.tar.gz${NC}"

echo -e "${GREEN}Downloading complete.${NC}"

# Extract Guacamole files
tar -xzf guacamole-server-${GUACVERSION}.tar.gz
tar -xzf guacamole-auth-jdbc-${GUACVERSION}.tar.gz
tar -xzf guacamole-auth-totp-${GUACVERSION}.tar.gz

# Make directories
mkdir -p /etc/guacamole/lib
mkdir -p /etc/guacamole/extensions

# Install guacd
cd guacamole-server-${GUACVERSION}

echo -e "${BLUE}Building Guacamole with GCC $(gcc --version | head -n1 | grep -oP '\)\K.*' | awk '{print $1}') ${NC}"

echo -e "${BLUE}Configuring. This might take a minute...${NC}"
./configure --with-init-dir=/etc/init.d  &>> ${LOG}
if [ $? -ne 0 ]; then
    echo -e "${RED}Failed. See ${LOG}${NC}"
    exit 1
else
    echo -e "${GREEN}OK${NC}"
fi

echo -e "${BLUE}Running Make. This might take a few minutes...${NC}"
make &>> ${LOG}
if [ $? -ne 0 ]; then
    echo -e "${RED}Failed. See ${LOG}${NC}"
    exit 1
else
    echo -e "${GREEN}OK${NC}"
fi

echo -e "${BLUE}Running Make Install...${NC}"
make install &>> ${LOG}
if [ $? -ne 0 ]; then
    echo -e "${RED}Failed. See ${LOG}${NC}"
    exit 1
else
    echo -e "${GREEN}OK${NC}"
fi

ldconfig
systemctl enable guacd
cd ..

# Get build-folder
BUILD_FOLDER=$(dpkg-architecture -qDEB_BUILD_GNU_TYPE)

# Move files to correct locations
mv guacamole-${GUACVERSION}.war /etc/guacamole/guacamole.war
ln -s /etc/guacamole/guacamole.war /var/lib/${TOMCAT}/webapps/
ln -s /usr/local/lib/freerdp/guac*.so /usr/lib/${BUILD_FOLDER}/freerdp/
ln -s /usr/share/java/mysql-connector-java.jar /etc/guacamole/lib/
cp guacamole-auth-jdbc-${GUACVERSION}/mysql/guacamole-auth-jdbc-mysql-${GUACVERSION}.jar /etc/guacamole/extensions/
cp guacamole-auth-totp-${GUACVERSION}/guacamole-auth-totp-${GUACVERSION}.jar /etc/guacamole/extensions/

# Configure guacamole.properties
rm -f /etc/guacamole/guacamole.properties
touch /etc/guacamole/guacamole.properties
echo "mysql-hostname: localhost" >> /etc/guacamole/guacamole.properties
echo "mysql-port: 3306" >> /etc/guacamole/guacamole.properties
echo "mysql-database: ${DB}" >> /etc/guacamole/guacamole.properties
echo "mysql-username: ${mysqluser}" >> /etc/guacamole/guacamole.properties
echo "mysql-password: ${guacdbuserpassword}" >> /etc/guacamole/guacamole.properties

# restart tomcat
echo -e "${BLUE}Restarting tomcat...${NC}"

service ${TOMCAT} restart
if [ $? -ne 0 ]; then
    echo -e "${RED}Failed${NC}"
    exit 1
else
    echo -e "${GREEN}OK${NC}"
fi

# Create guacamole_db and grant $mysqluser permissions to it

# SQL code
SQLCODE="
create database ${DB};
create user if not exists '${mysqluser}'@'localhost' identified by \"${guacdbuserpassword}\";
GRANT SELECT,INSERT,UPDATE,DELETE ON guacamole_db.* TO '${mysqluser}'@'localhost';
flush privileges;"

# Execute SQL code
echo ${SQLCODE} | mysql -u root -p${mysqlrootpassword}

# Add Guacamole schema to newly created database
echo -e "Adding db tables..."
cat guacamole-auth-jdbc-${GUACVERSION}/mysql/schema/*.sql | mysql -u root -p${mysqlrootpassword} ${DB}
if [ $? -ne 0 ]; then
    echo -e "${RED}Failed${NC}"
    exit 1
else
    echo -e "${GREEN}OK${NC}"
fi

# Ensure guacd is started
service guacd start

# Cleanup
echo -e "${BLUE}Cleanup install files...${NC}"

rm -rf guacamole-*
if [ $? -ne 0 ]; then
    echo -e "${RED}Failed${NC}"
    exit 1
else
    echo -e "${GREEN}OK${NC}"
fi

echo -e "${BLUE}Installation Complete\nhttp://localhost:8080/guacamole/\nDefault login guacadmin:guacadmin\nBe sure to change the password.${NC}"
Give that script the execution right:
chmod +x install_guacamole.sh
Install Guacamole:
./install_guacamole.sh
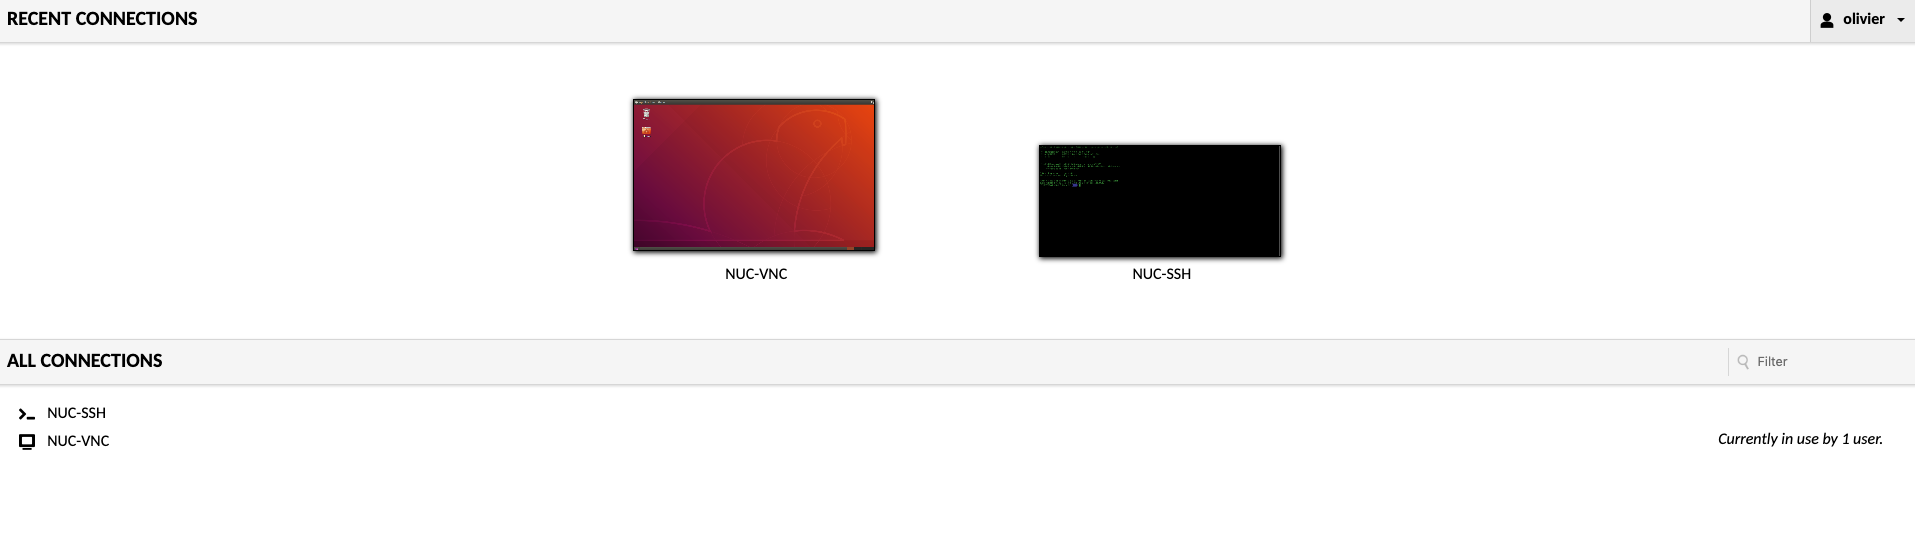
Configure Guacamole
Create a new user and create 2 connections (one for SSH and one for VNC). This is very easy I do not describe this part.
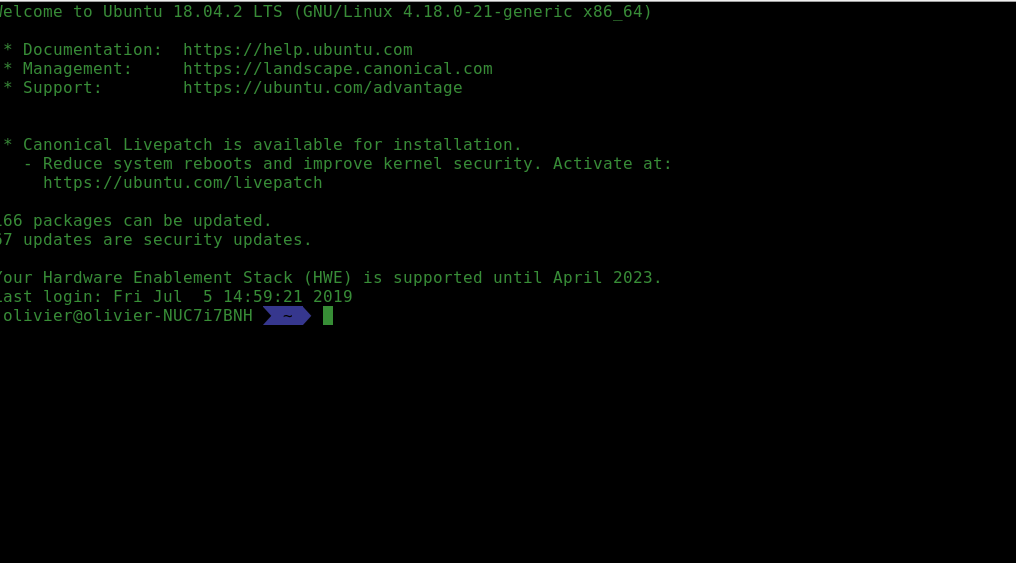
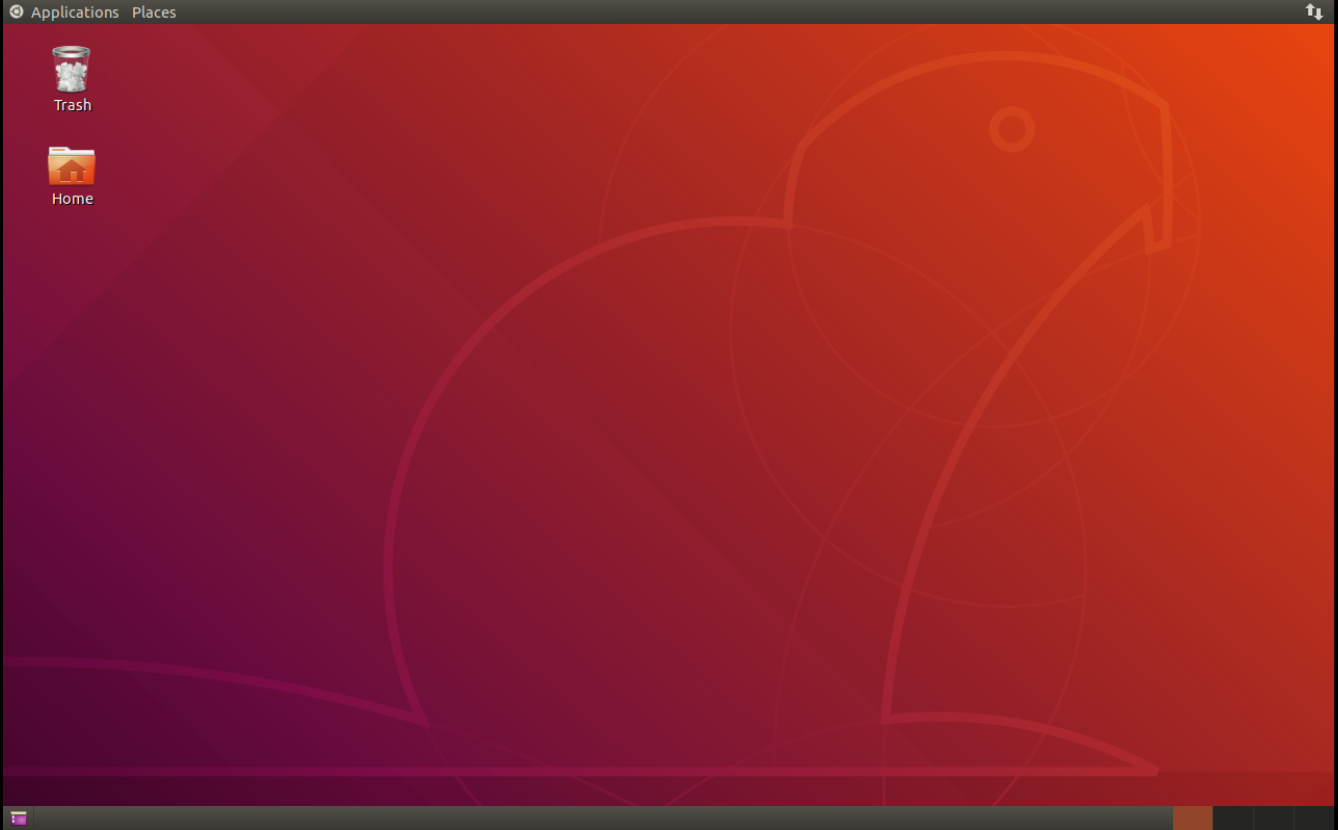
At the end you will have this:
Configurer un reverse proxy Nginx
Installer Nginx:
apt install nginx
Activer le service:
systemctl enable nginx
Générer un certificat SSL/TLS auto-signé:
openssl req -x509 -nodes -days 365 -newkey rsa:2048 -keyout /etc/ssl/private/guacamole-selfsigned.key -out /etc/ssl/certs/guacamole-selfsigned.crt
Configurer Nginx. Créer le fichier /etc/nginx/sites-available/nginx-guacamole-ssl et ajoutez le contenu suivant:
server {
	listen 80;
	server_name guacamole.example.com;
	return 301 https://$host$request_uri;
}
server {
	listen 443 ssl;
	server_name guacamole.example.com;

	root /var/www/html;

	index index.html index.htm index.nginx-debian.html;

    	ssl_certificate /etc/ssl/certs/guacamole-selfsigned.crt;
	ssl_certificate_key /etc/ssl/private/guacamole-selfsigned.key;

	ssl_protocols TLSv1.2 TLSv1.3;
	ssl_prefer_server_ciphers on;
	ssl_dhparam /etc/nginx/dhparam.pem;
	ssl_ciphers ECDHE-RSA-AES256-GCM-SHA512:DHE-RSA-AES256-GCM-SHA512:ECDHE-RSA-AES256-GCM-SHA384:DHE-RSA-AES256-GCM-SHA384:ECDHE-RSA-AES256-SHA384;
	ssl_ecdh_curve secp384r1;
	ssl_session_timeout  10m;
	ssl_session_cache shared:SSL:10m;
	resolver 192.168.42.129 8.8.8.8 valid=300s;
	resolver_timeout 5s;
	add_header Strict-Transport-Security "max-age=63072000; includeSubDomains; preload";
	add_header X-Frame-Options DENY;
	add_header X-Content-Type-Options nosniff;
	add_header X-XSS-Protection "1; mode=block";

	access_log  /var/log/nginx/guac_access.log;
	error_log  /var/log/nginx/guac_error.log;

	location / {
		    proxy_pass http://guacamole.example.com:8080/guacamole/;
		    proxy_buffering off;
		    proxy_http_version 1.1;
		    proxy_set_header X-Forwarded-For $proxy_add_x_forwarded_for;
		    proxy_set_header Upgrade $http_upgrade;
		    proxy_set_header Connection $http_connection;
		    proxy_cookie_path /guacamole/ /;
	}

}
Générer un certificat Deffie-Hellman pour avoir une clé d’échange. Le flag -dsaparam est ajouté pour accélérer la génération:
openssl dhparam -dsaparam -out /etc/nginx/dhparam.pem 4096
Activer la configuration Nginx:
ln -s /etc/nginx/sites-available/nginx-guacamole-ssl /etc/nginx/sites-enabled/
Vérifier la bonne configuration:
nginx -t
 nginx: the configuration file /etc/nginx/nginx.conf syntax is ok
 nginx: configuration file /etc/nginx/nginx.conf test is successful
Restart Nginx:
systemctl restart nginx
Troubleshooting
Accéder à VNC via le réseau local
Editer le fichier /etc/systemd/system/[email protected] et ajouter l’option -localhost no au démarrage du service ExecStart=/usr/bin/vncserver -localhost no ....
Utiliser le port 5900 ou 5901
1600 Mots
05 juil.. 2019